For our Halloween murder mystery party, I wanted to have a medium-sized witch's cauldron for our table centerpiece and a large cauldron as the focal point for our lounge decorations. The shop-bought cauldrons I could see were all fairly small and so I decided to make my own using Chinese lanterns and paper mache.
The resulting decorations are stunning indoor centerpieces that are suitable for Halloween parties and also for Horror parties. (Our Murder at Horror Castle is set in the Witch Kingdom and so these decorations could be ideal.)
As they are made out of paper, they obviously cannot get wet or be subjected to rough handling. You will end up with circular indentations where the wire rims of the lanterns are but this adds to the charm and authenticity of the finished cauldrons.
1 How the Cauldrons Fitted Into My Halloween Murder Mystery Party Decorations
Our Halloween-themed murder mystery game is set in a hotel called the "Cobwebs and Cauldrons Hotel". Having cauldrons as the focal point of my mystery party decorations therefore seems very appropriate.
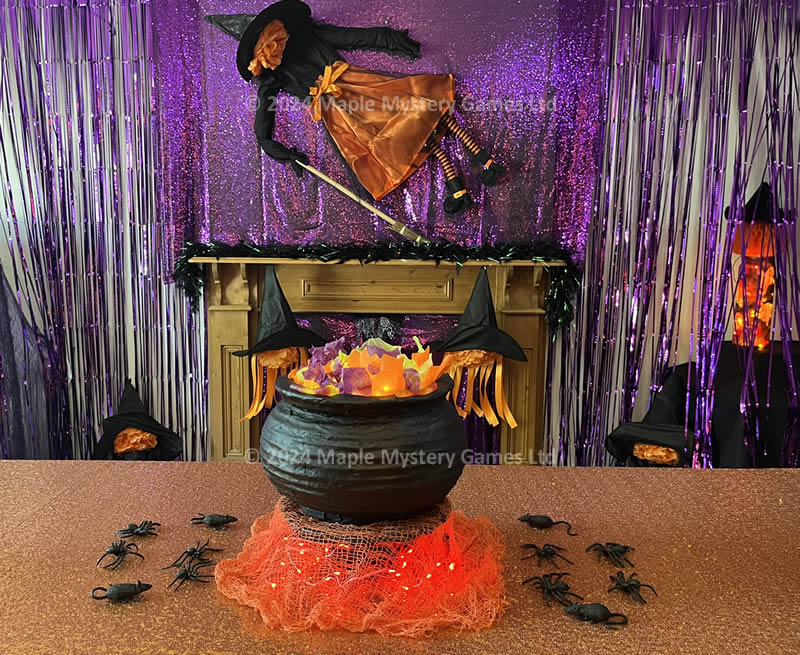
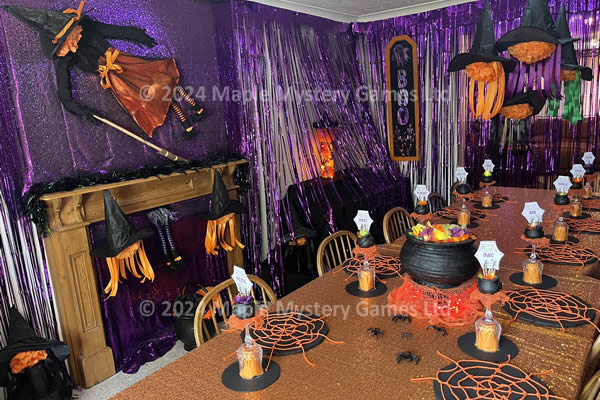
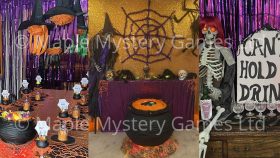
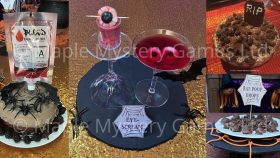
Medium and large witch's cauldrons together with Halloween decorations for our "Murder at the Halloween Party" test evening.
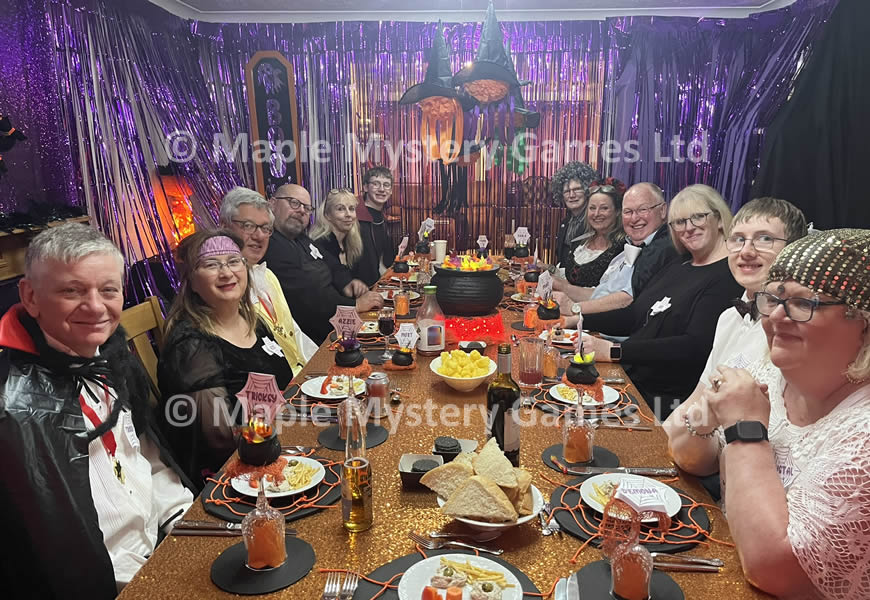
Left Photo: I used the medium (12-inch / 30.5 cm) cauldron as the focal point for my table decorations. I followed this through with miniature cauldrons as a place card colder for each party guest.
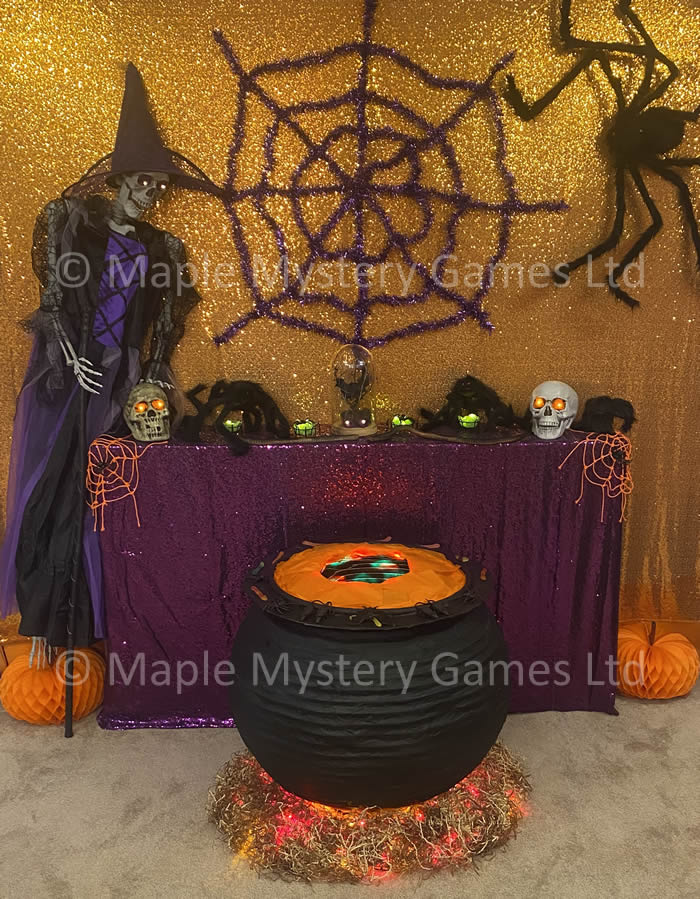
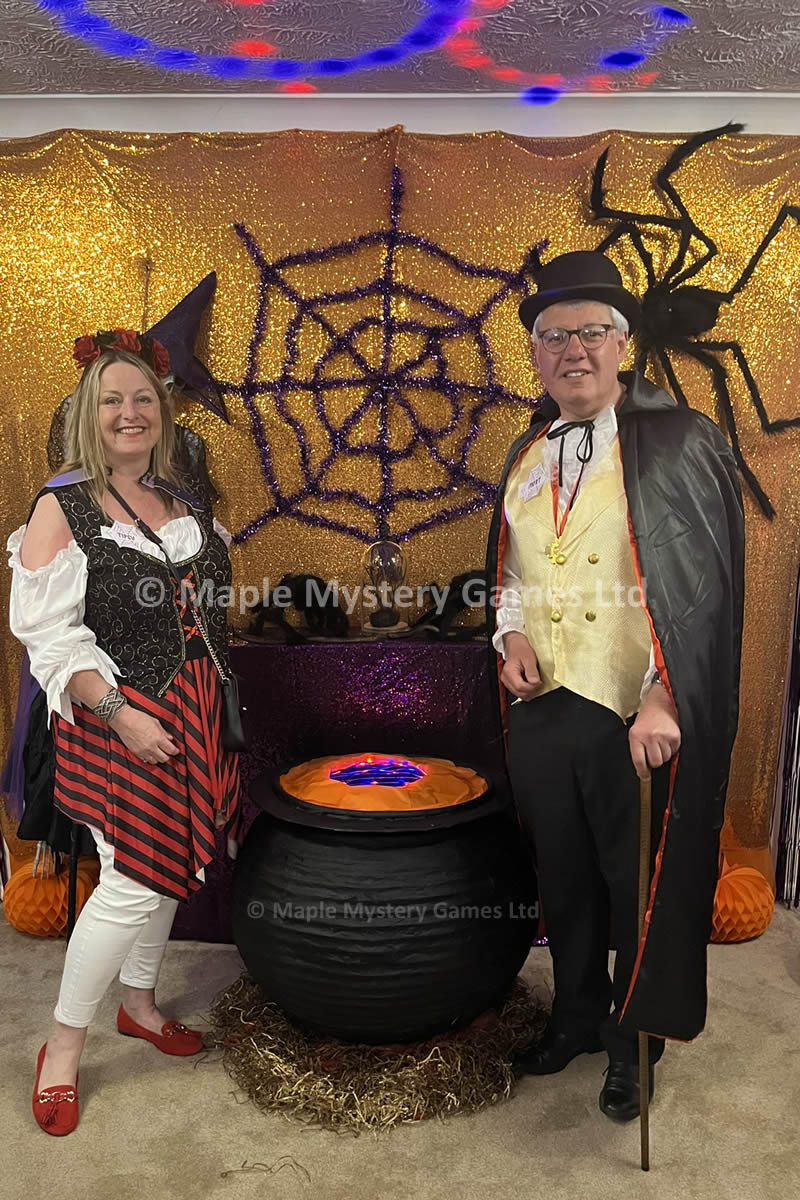
Right Photo: I used the large (30-inch / 76 cm) cauldron as the focal point for my lounge decorations. It was also the focal point for many of our group party photos.
I expanded on the cauldron theme by having different witchy party decorations.
2 What You Will Need For Your Cauldron Party Decorations
2.1 Essential Items
Chinese or paper lantern (8 - 30 inches wide depending on whether you wish this to be a table centerpiece or a room focal point).
I chose TOVINANNA's 12-inch paper lantern for the medium-sized cauldron as the shape was more oval-shaped than most other lanterns; I used a black 30-inch round paper lantern from TimeToSparkleUK's shop on Etsy for the large cauldron.
Paper mache.
I used old newspapers and made a paste out of flour and water.
Spray paint.
I used Tetrion Easy Spray Paint, Matt Black. Two 400ml packs were enough to spray-paint both cauldrons. Then I (just) had enough left over to spray-paint a vase and mirror.
Cardboard for the rim - the cardboard must be large enough so that the rim is slightly smaller than the largest circumference of the lantern.
2.2 Optional Items
Something to make the raised part of the rim such as old rubber pipe or layers of cardboard.
Decorators Caulk to attach the lantern to the rim and the base.
Something to make the base. (If the lantern is oval-shaped, it is likely to be less likely to topple over and therefore the base could simply be something round such as a stack of old records or a round box. If the lantern is round-shaped, it could be more likely to topple over and so the base would be best to offer support at the sides; one example of a base support is the bottom part of a laundry basket.)
Something to make the "flames". For example, red or orange tissue paper, napkins or card; red or orange creepy cloth; red or orange fairy lights.
Something to make the wood kindling. For example, sticks from your garden, dead wood from climbing shrubs or shredded cardboard packaging.
Decorations for the top - examples are red, orange, green or purple tissue paper, gummy worms, fake spiders.
Lights - add a spooky glow inside the cauldron with disco lights, fairy lights or even a home TV simulator. For a large cauldron, the disco lights look the most dramatic.
3 Important Note for Paper Mache
Using paper mache on paper lanterns is not the same covering a solid structure with paper mache. If you add too much paper mache at once, the paper lantern can sag or bow. This is particularly the case when covering the base of the lantern with paper mache although I also found this when I tried covering too large an area of the large lantern at once.
It is best to cover a certain number of rings (for example the top third of a lantern) and then to hang this up to completely dry before doing the next third. Exactly how many rings you cover at once will depend on how much paste you add to the newspaper and also on the size of your lantern.
When covering the base, turn the lantern upside down to help reduce sagging.
After each round of paper mache, hang the lantern to dry so that gravity will help to stop the base from sagging.
If you have a circular lantern (rather than an oval-shaped one), you will find it helpful to secure the lantern with a string from the ceiling while covering it with paper mache. Otherwise, the lantern spins around as you are trying to cover it. This is particularly the case with a large lantern.
4 Note on Lantern Size and Color
When choosing your lantern size, consider the width of your door opening! I chose a 30-inch lantern for the main cauldron as I wanted to make a statement. Once it was covered in paper mache, however, it was too wide to fit through a normal door opening. (Luckily, we have double doors leading out from our lounge to our garden and so this was not an issue for us.)
If you want to leave the cauldron open at the top, then consider getting a black lantern so that you do not need to spray paint the inside. If you intend to cover the top in tissue or crepe paper, then this is not an issue.
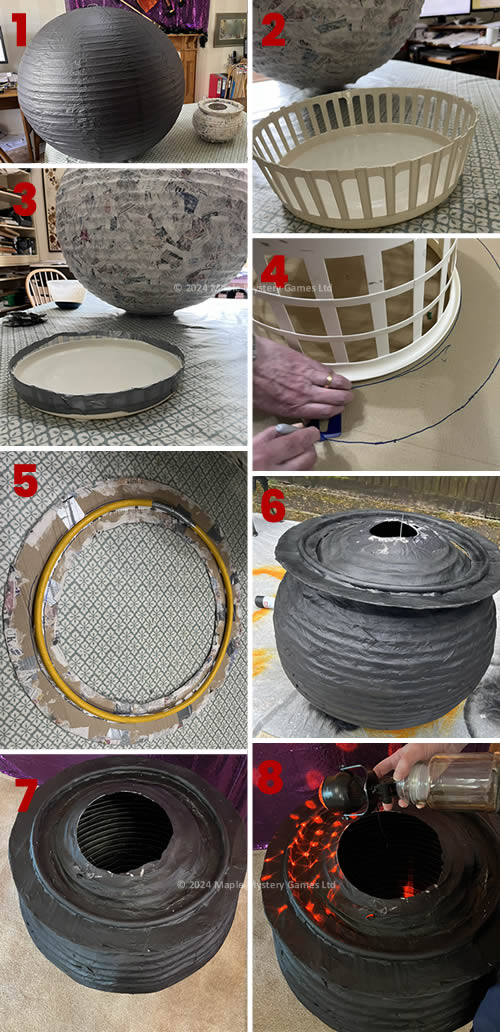
5 Making the Medium-Sized Witch's Cauldron
5.1 Making Your Cauldron
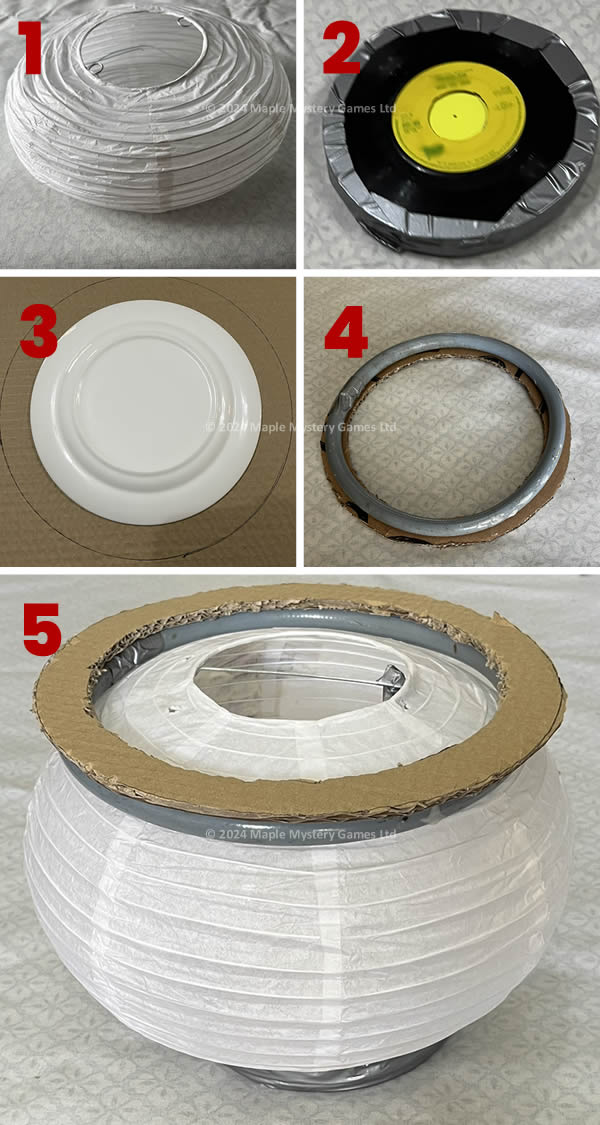
Components for a medium-sized cauldron: Chinese lantern, single records taped together, cardboard rim, old hose pipe
5.1.1 Choose your paper lantern. Ideal sizes for a table centerpiece could be 8-12 inches. I chose TOVINANNA's 12-inch paper lantern as the shape was more oval-shaped than most other lanterns.
5.1.2 Optionally, create a round base shape to add height to the finished cauldron. I used a stack of old singles records and then taped them together.
5.1.3 For the rim, I took a thick piece of cardboard. I drew around an LP record to give me a neat outer circle of the rim. I then used a dinner plate to create a neat inner circle. I then cut out the circular cardboard shape.
5.1.4 I used duct tape to hold an old piece of hose pipe together and then glued this to the cardboard rim.
Note: if you do not have old hose pipe, add texture with a smaller circle or two of cardboard.
5.1.5 The basic shape of the cauldron can be seen in step 10 (image below).
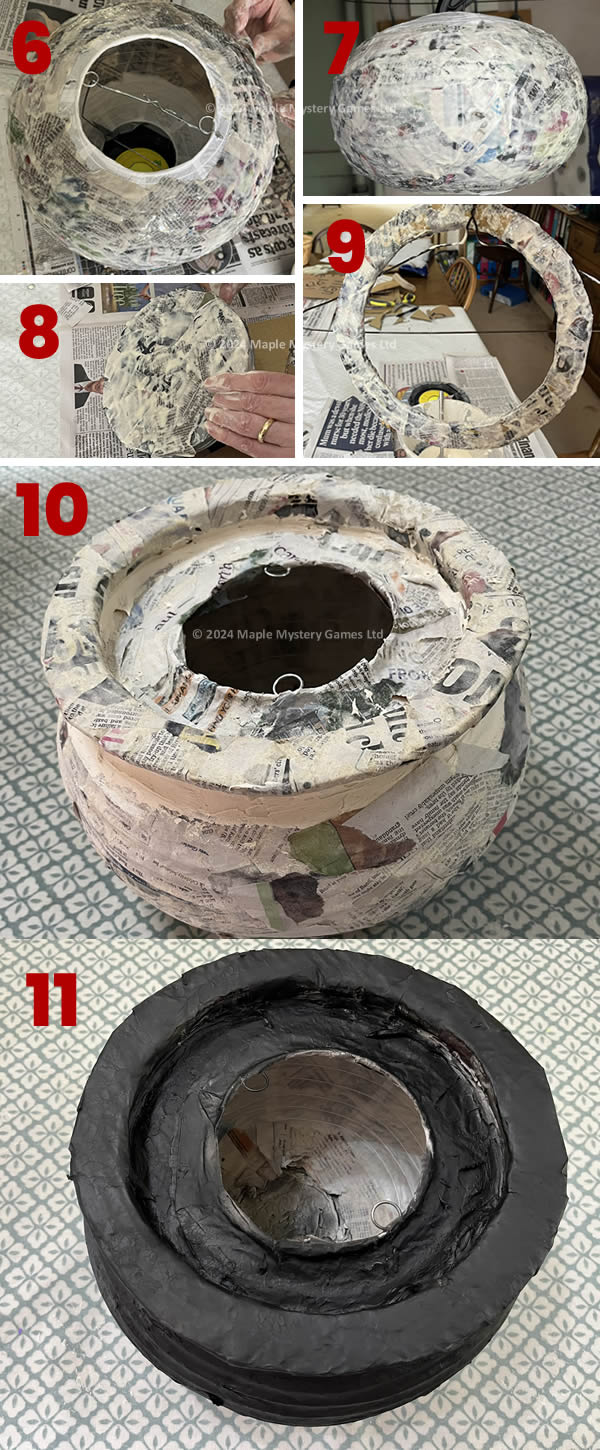
Steps 6-10: covering the lantern, rim and base with paper. Step 11: spray painting.
5.1.6 Paper mache the lantern. I used flour and water for the paper mache.
Important: the paper lantern is fragile. If you use too much paste and/or do too many rings at once, the lantern could sag at the bottom or sag out of shape at the sides. It is best to allow yourself time to paper mache in stages.
Important: if there are any runs, correct these before the paper mache dries. They will be visible after spray painting!
5.1.7 After each round of paper mache, allow the lantern to completely dry before doing the next layer. (I hung the lantern in the boiler cupboard to dry.)
Note: how many layers of paper mache you use will depend on how long you wish the cauldron to last. I only needed the cauldron for a single party and so I used 2 layers of paper mache and then put disco lights inside the lantern to see where the light shone through; I then did a third layer of paper mache over these areas. If you wish to use the witch's cauldron year after year, you may wish to strengthen the final decoration with more layers of paper mache.
5.1.8 Add a layer of paper mache to the base so that it is easier to spray paint.
5.1.9 Add a layer of paper mache to the cardboard and pipe rim.
5.1.10 Use Decorators Caulk to seal the gaps between the rim and the lantern and between the base and the lantern.
Note: I originally tried to use more paper mache to seal the rim and the base. Even though I waited for the layer of paper mache to dry, this ended up in a soggy mess and I had to rescue the sagging lantern by hanging it in the boiler cupboard to dry. (Gravity then helped the wire insert to keep the lantern's shape.)
5.1.11 Spray paint the cauldron using black paint. (I used Tetrion Easy Spray Paint, Matt Black. Two 400ml packs were enough to spray-paint both cauldrons. Then I (just) had enough left over to spray-paint a vase and mirror.) I chose to spray paint directly on the paper mache and it worked for me; I only wanted the cauldrons for a single Halloween party. However, read the instructions on the spray paint you use. If you wish to keep your cauldron for future years, you may decide to use primer or sealer. That is your choice.
Important: spray paint in thin layers to avoid getting the paper mache soggy and to avoid runs.
Important: follow all safety instructions. I chose to spray paint outside, wearing a mask and using a large dust sheet, to protect both my lungs and the furniture.
5.2 Decorating Your Cauldron
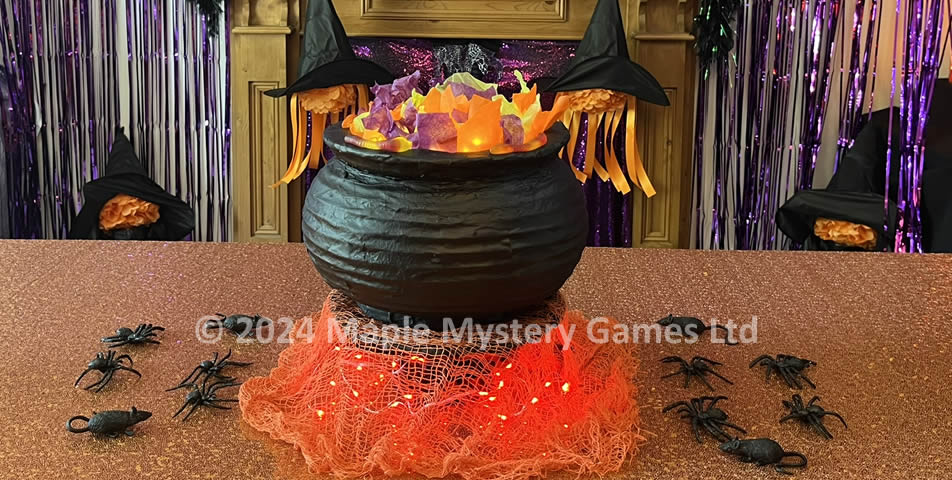
I decorated our witch's cauldron with tissue paper in Halloween colours (orange, purple and green) and placed it on a cake stand covered in black tissue paper.
The "flames" were created by red fairy lights underneath orange creepy cloth.
I covered the top of the cauldron with a layer of orange tissue paper and glued this to the inner rim. I then simulated bubbles by tearing small squares of orange, purple and green tissue paper and placing small balloon lights inside each square to create a glow. I used LIHAO mini-LED lights in a warm white color. (Please follow all necessary safety considerations.) I added a few gummy worm sweets around the rim.
To give the cauldron added height, I covered a cake stand in black tissue paper.
For the "flames", I used a small strip of battery-powered red fairy lights from BOLWEO. I covered the fairy lights and the tissue-covered cake stand with orange creepy cloth and then added the cauldron on top.
5.3 Other Party Cauldron Table Settings
For our murder mystery test party, I teamed this cauldron centerpiece with miniature cauldron table place settings and a witch display over the fireplace. See how I decorated for our Halloween murder mystery.
Halloween dining room decorations: witches, cauldrons and spiders' webs
6 The Large Witch's Cauldron
6.1 Making the Cauldron
Making the large witch's cauldron decoration: 30-inch-wide cauldron
The method of making a large cauldron is very similar to the method for the medium-sized one. A few differences:
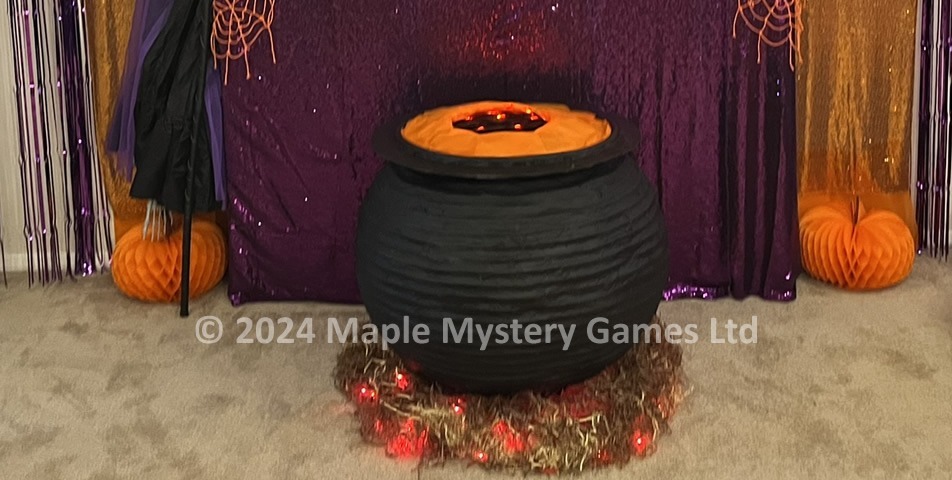
I used a black 30-inch paper lantern from TimeToSparkleUK. The black color enabled me to leave the cauldron open at the top and not need to spray paint the inside.
Note: such a large lantern will not go through single doorways.
As the bottom of the lantern could easily topple, John made me a base from the bottom of a (broken) circular wash basket.
In order to give such a large rim stability, I used two sheets of cardboard and also an old hose pipe. For this cauldron, I put the rim with the hose side upwards.
Note: if you do not have old hose pipe, add texture with a smaller circle or two of cardboard.
Once I had added two coats of paper mache, I put some disco lights inside to test for color leakage. I then covered up these patches with more paper mache and allowed the lantern to thoroughly dry before spray painting.
John carefully cut away the top few rings of paper mache using a Stanley knife and wire cutters.
John made me a base for the disco lights inside the lantern by attaching them to an empty coffee jar.
6.2 Decorating the Cauldron
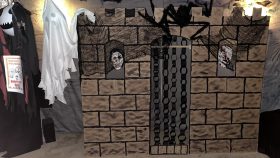
This large witch's cauldron formed the central decoration for our Halloween murder mystery party and also served as a photo backdrop. The skeleton in witch's clothes and the giant spider and spider's web formed part of the backdrop.
I covered the rough part of the inner rim with orange tissue paper and then added a few fake spiders, mice and gummy worms around the rim.
I placed disco lights inside the cauldron for a stunning display.
For the "flames", I used red tissue paper and shreds of red and orange napkins. I then added some sparkle with some Christmas fairy lights and BOLWEO's battery-powered red fairy string lights.
For the kindling, I used the shredded cardboard that different purchases had come packed in.
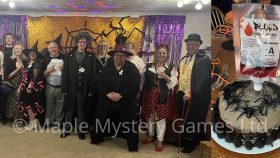
7 Our Halloween Murder Mystery Party - Some Photos of the Cauldrons With Our Guests
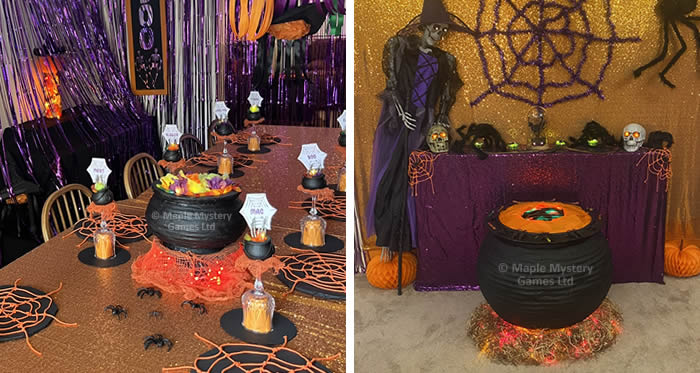
The dining room cauldron and the miniature cauldrons for table place card settings were much admired by our party guests:
The cauldron in the center of the table and the miniature cauldron place settings were an ideal setting for our murder mystery. The witch hats floating over the table added to the witchy theme.
The lounge cauldron formed a wonderful backdrop for our party photos.
These ideas are provided for your inspiration only. Any recipes or recipe ideas should be tested before your party. Ideas for party recipes, decorations or costumes should be adapted as you wish. It is YOUR responsibility to follow any necessary safety precautions.
We use cookies to ensure you get the best experience and to analyse our traffic: see Cookie Policy