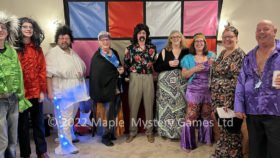
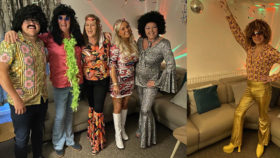
These hip, groovy decorations are designed for our Murder at the 70s Disco Party game but many ideas will be suitable for other 70s or disco parties as well.
1 Your Party is Set in a 70s Disco in DiscoLord Hotel - so Discotheque Decorations are Funky, Man
1.1 Disco Lighting
1 The easiest way to turn your murder mystery into a funky discotheque is to use a disco ball party light set. This can be bought at a fairly reasonable price from sites such as Amazon. (We used Gritin Lights for our test party but there are other makes.)
Tip: if you wish to save money, a simple colander placed over a light bulb creates all sorts of interesting patterns! Put alternating Christmas lights inside a colander for an even groovier effect.
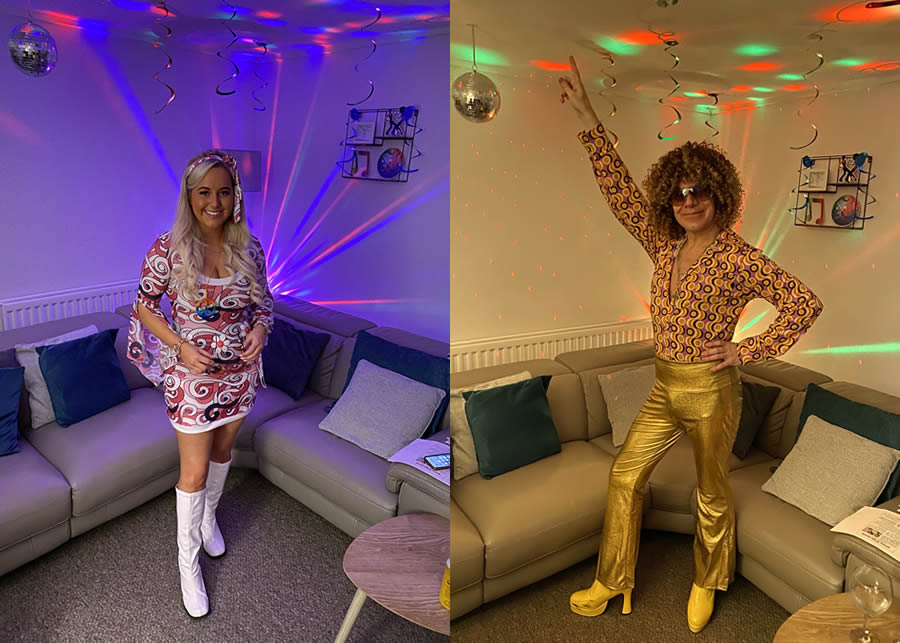
Funky lighting transformed the simple but effective decorations at Aileen's superb party
2 Alternatively, use a "black light" set and glow-in-the-dark neon decorations to transport your guests back to the age when black lights would make t-shirts (and other clothing items) glow bright white.
1.2 Disco Tablecloth, Backdrop or Scene Setter
3 Another easy way to make your party hip and groovy is to add a disco tablecloth. For extra funky appeal, use specially themed plates, cups and napkins. But any brightly colored napkins could do just as well.
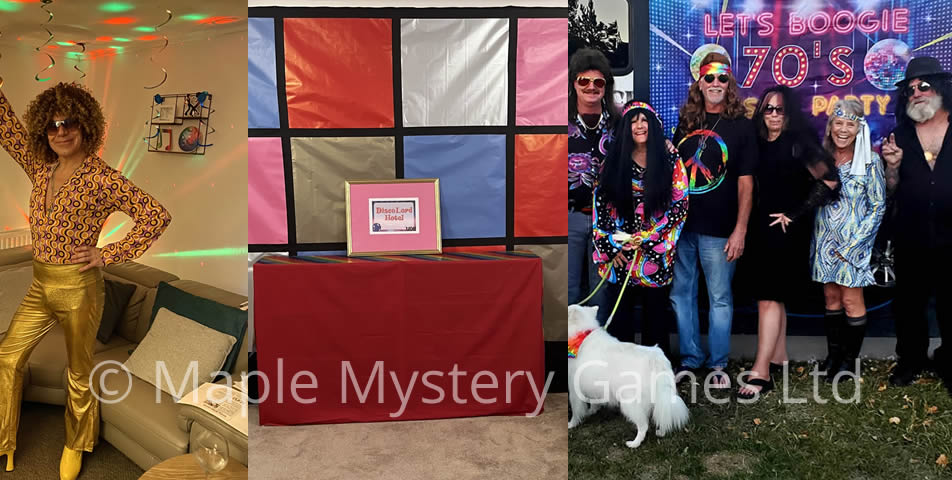
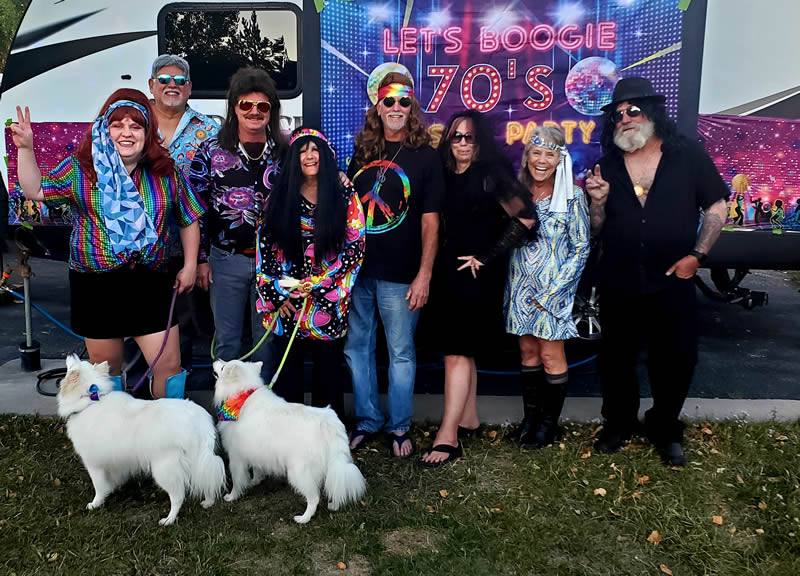
4 A "Boogie" party backdrop or scene setter creates an ideal focal point for your party - and also serves as an ideal photo opportunity. Rebecca's superb 70s murder mystery was held during a camping weekend on a campsite where decorations were difficult but she created a real groovy vibe with themed boogie backdrops and tablecloths.
Rebecca's superb campsite party with a "Let's Boogie" backdrop
1.3 Disco Ball
Del DiscoLord was killed inside a giant discotheque ball and so any form of disco ball decor fits right in with the theme of your murder mystery party.
5 Buy or make a large ball to hang from the ceiling or place in a corner of the room.
DIY: start with a styrofoam ball. For the hook, take a long piece of wire that is twice the width of the ball plus an extra few inches; fold the wire in half and thread it through the ball; twist the bent part to make a hook and splay the bottom two lengths out to either side; optionally add a touch of glue for added security. Alternatively, use a screw ring and glue in place. Optionally paint the styrofoam ball with silver or gold paint before proceeding. For the mirrored squares, use a flexible mirrored sheet, aluminium foil or shiny gold or silver wrapping paper; using a pen or pencil, measure out and mark a square grid pattern on the sheet or CDs; cut evenly sized squares. Alternatively buy pre-cut mirrored tiles in either squares or circles. Starting in the centre, carefully glue each tile in a row around the ball; then glue the next row and the next until finished.
Tip: optionally, paint the styrofoam ball with silver paint before glueing the squares to it. Optionally paint the different squares with a coloured marker.
Tip: while old CDs might be used instead of mirrored tiles, they can be tricky to cut and could blunt ordinary scissors. The CDs can be made more malleable by soaking them (one at a time) in hot water but please do take all necessary safety precautions!
6 String several smaller balls ones together and hang from the ceiling.
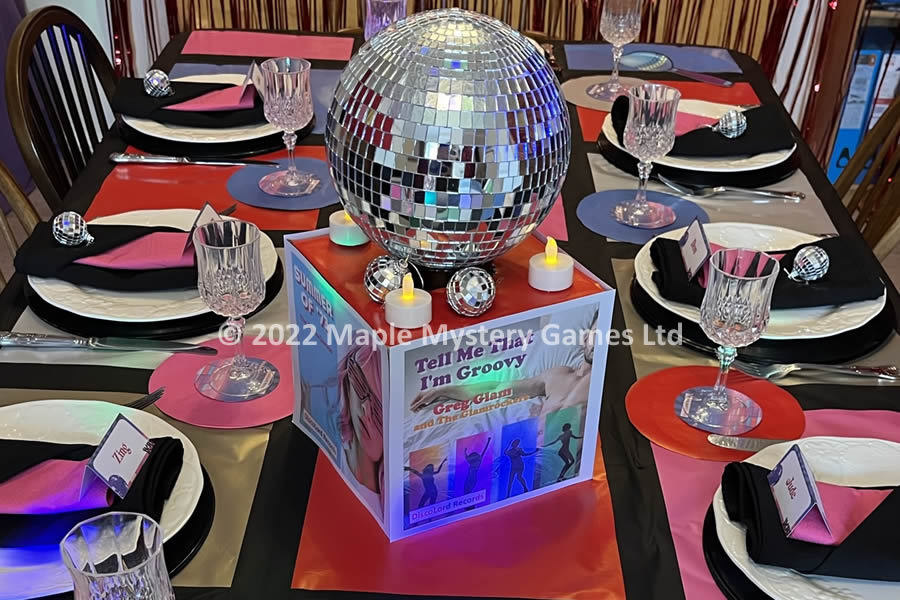
7 Use a disco ball as a funky table centrepiece. Rather than filling a vase with flowers, place a ball on top for a simple centrepiece.
8 Fill a glass vase with mini silver balls and then top with a larger one for a glimmering table centrepiece.
9 Or create a unique and hip table centrepiece by glueing the printouts in our decoration pack to a small square cardboard box and then topping it with silver spheres of different sizes. See our test party decorations for how we did this.
Homemade disco ball table centerpiece using printouts from the game's decoration pack.
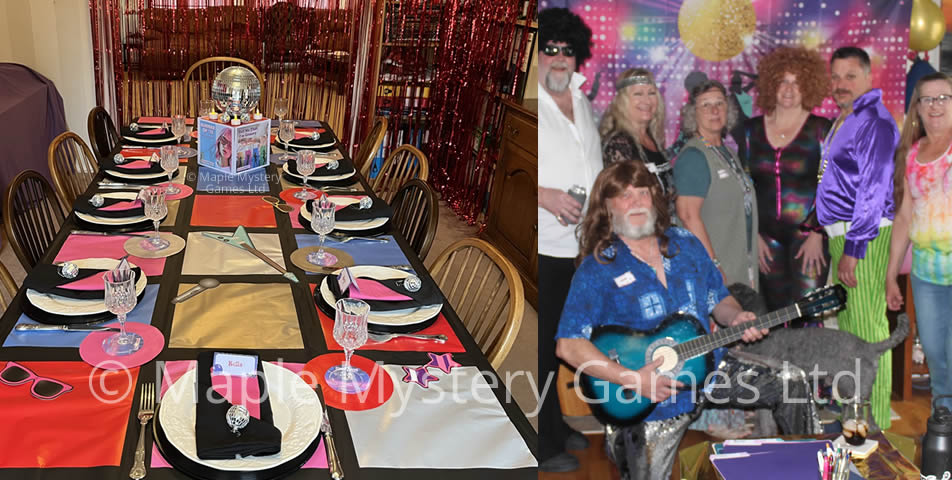
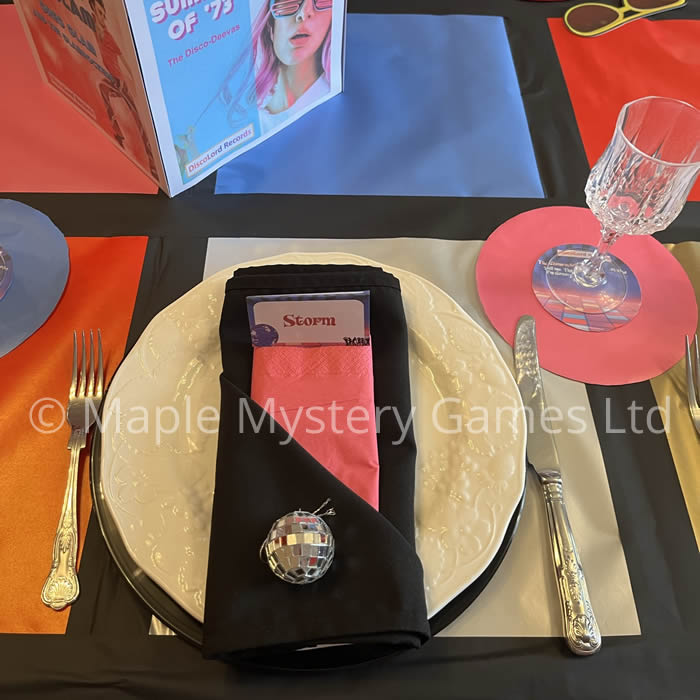
10 Use miniature disco balls for your place settings - or use mini silver sphered keychains as fun place settings - and then reuse them as party favours. In the photo above, you can see how the miniature spheres added a sparkle to the black and pink napkins.
11 Buy a disco ball ice bucket - you can later reuse this as a pencil holder.
12 Give each guest their own disco ball cup - maybe allow each guest to keep their own cup after the party as a party favour.
13 Try foil discotheque ball balloons to add an easy groovy ambience.
1.4 Recreate a 1970s Discotheque With "Dance Floor" ...
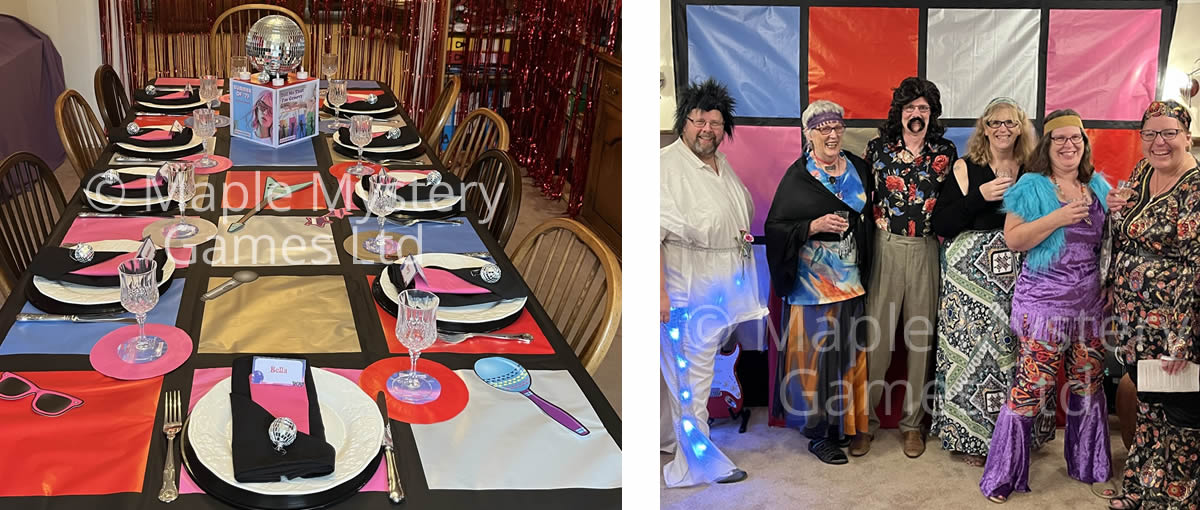
14 Hiring a dance floor is expensive, but with a bit of time and ingenuity, you can create your own "discotheque floor" and use this as an eye-catching tabletop (instead of a tablecloth) or use it as a stellar wall hanging. You could use it as a floor centrepiece but it could get torn as people walk across it.
Method: If you don't want to attach materials directly to your table, walls or floor, then use a large, flat king-size sheet or large cheap tablecloth. For the coloured squares, use neon poster-size card or paper, rolls of coloured cellophane or self-coloured wrapping paper or metallic wrapping paper. Use a pencil and ruler to mark out a grid of squares then cut your coloured paper/card into the appropriate-sized square shapes. Tape squares to the sheet (or other surface) into a chequerboard pattern of your choosing and then use a wider coloured or black duct tape to create the grid lines. See how we decorated our 70s disco test party for further details.
Tip: hang the decorated sheet from the coving to avoid damaging your walls. If you want to make an extra statement, place alternating Christmas lights behind the sheet. Obviously, please ensure all necessary safety requirements are met!
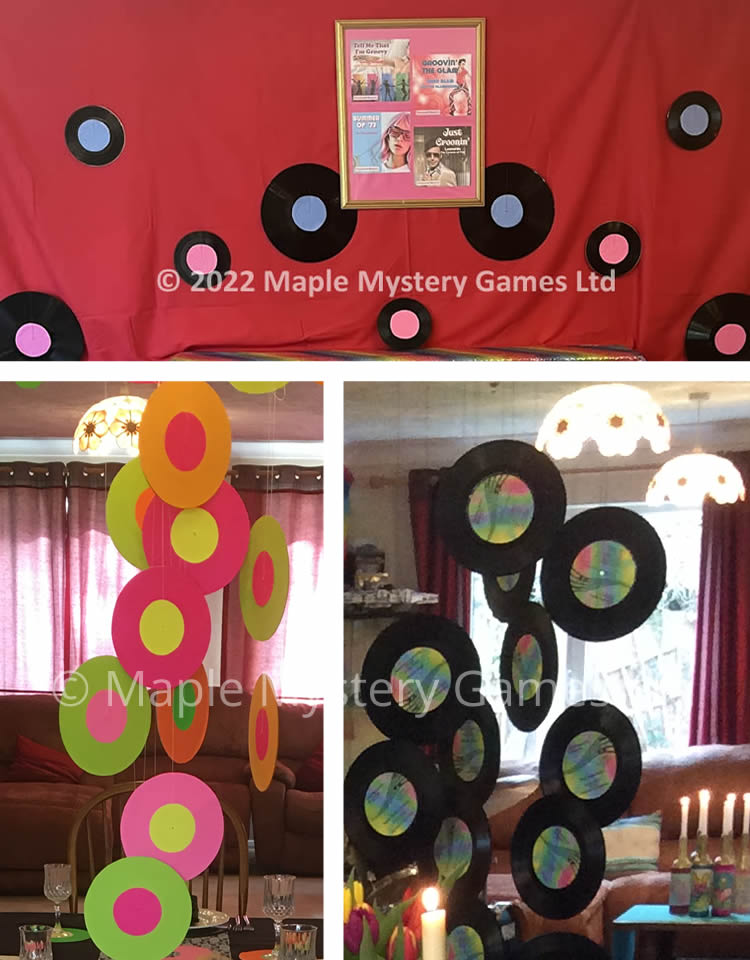
For our test party, we created a stunning "disco floor" tablecloth and then echoed this as a wall hanging to create a groovy photo backdrop. Note how we echoed the 5 main colours of the tablecloth squares by covering single records with the same self-coloured wrapping paper and then using bright pink napkins to blend with the pink squares of the tablecloth.
This disco floor tablecloth and wall background is made from wrapping paper and masking tape.
15 Cover old tablemats and coasters with paper. Cut sheets of colored foil paper into squares. Arrange on tablemats and coasters in the form of a disco floor and either glue or tape in place. (Brands such as Ultnice and Sortumola sell large packs of colored candy foil wrappers via Amazon.)
16 Echo these tablemats and coasters by covering a small cardboard box in black paper. Then cut squares of colored foil paper and arrange them around the sides of the box. Put a vase with flowers in the middle of this box for an unusual-themed table centerpiece.
17 To follow through with this floor theme, arrange other squares of colored foil paper on large sheets of black card for a wall visual. Alternatively, arrange and glue to an (old) mirror.
1.5 Other Discotheque Ideas
18 Place metallic tinsel foil curtains or beaded curtains in doorways - or hang across an entire wall to shimmer and bounce light. These curtains are also a groovy way of covering unsightly modern furniture. (We used them to cover heavy bookcases in our dining room that were filled with unsightly but necessary "office" filing.)
19 Place posters of the decade's singers on walls - or on your table. A few famous stars include Donna Summer, Gloria Gaynor, and The Bee Gees but feel free to choose your own favourite. Make these posters more visually eye-catching by placing on a large piece of colored card, black card or card covered with silver foil. Then hang over a metallic shimmer curtain for even more effect.
20 Use the posters from the game's party pack to give you posters for the stars of Del DiscoLord's music empire.
21 Hang foil swirl or metallic streamer decorations from the ceiling. Brands such as Blulu incorporate different themed ornamental cutouts to go with these foil swirls.
22 Buy large dancing silhouettes from a brand such as Beistle. Use these to provide a focal point to your walls. To make these look more dramatic, extend the visual impact by surrounding them with balloons and foil curtains. Or place them on large contrasting colored cards or large mirrors.
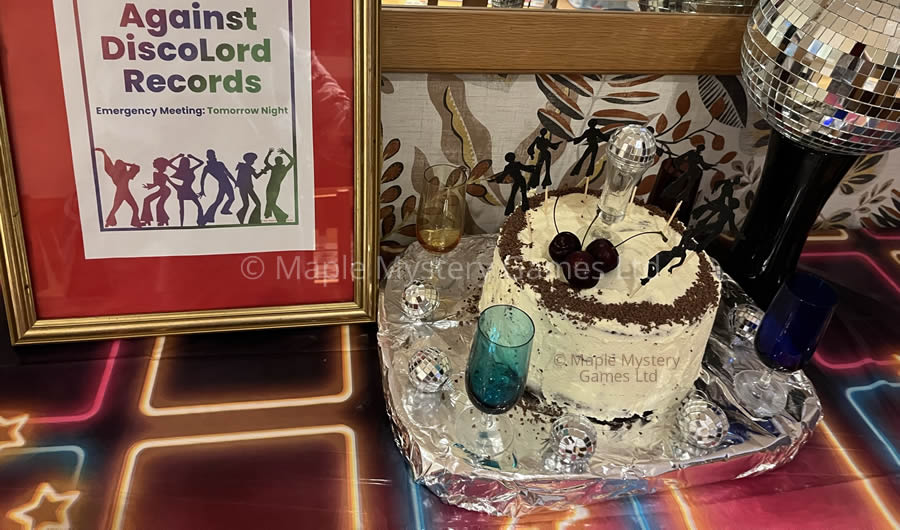
23 Buy a pack of disco dancing cupcake toppers and use these to add sparkle to cupcakes, cakes - and also to trays of sandwiches or other food. We bought a pack of 24 from Gyufise, but there are other brands.
24 Anything silver, glass or mirrored can bounce the light about. If you do not have the right colored mats, then cover your existing mats in aluminum foil for an instant silver sparkle. In the photo below, we covered a wooden breadboard with silver foil and then adorned the cake with Gyufise cake toppers and a small shot glass topped with a miniature silver ball.
25 Use metallic confetti to accessorize your table. Buy from online party sites or else make your own by using sheets of colored foil (see 15 above) and a simple hole puncher or a craft paper puncher.
Black Forest Gateau. the aluminium kitchen foil covering the base blends with the disco balls and adds sparkle; the 70's Disco Dancing Cupcake Toppers are by Gyufise.
2 Musical Decorations
Del DiscoLord Was a Music Mogul - So Get Musical, Man
25 Cut musical shapes (such as a musical note or a guitar) out of thick cardboard and sprinkle with glitter; add these to the table centrepiece or blue tack to walls.
26 Buy some musical notes confetti and sprinkle on the table and coffee tables.
27 Have guitars hanging from the walls - even a drum set or small piano visible. For a real statement, place guitars on stands on top of a sideboard or side table. Optionally, cover the sideboard or side table with colorful scarves first.
Get some old records (LPs and singles) from a charity shop or garage sale. Use these records as they are - or else use the record centres provided in your party pack as record centre inserts. Alternatively, use the same neon card/cellophane paper/wrapping paper that you used for the discotheque floor as record centrepieces.
28 Use the records as part of a table centrepiece.
29 Use the records to make a cake stand.
30 Use the records as tablemats and coasters.
Important note: if using records as tablemats and if you have a wooden or non-heat-resistant table, then build up heat resistance by layering a record then a circular cutout of cardboard (or the record cover), then another record, then another circular cutout, then another record etc until you have the heat-resistance you need. Please do CHECK heat resistance before using! We found that a layer of cardboard in between records did add to the heat resistance. However, we only used these records as placemats - we did not use them for hot dishes directly from the oven.
We layered records and cardboard circles to create placemats; we covered Singles with self-coloured wrapping paper and then added the crcular record inserts from the game's decoration pack
31 Use these records as mobiles to hang from lights or the ceiling.
32 Use the records to line the sides of your entrance doorway.
33 Hang them against a colored backdrop in an attractive pattern. (We created an eye-catching display above our fireplace by using a bright red sheet and framing some printouts from the game's decoration pack. We then added visual interest by suspending a mix of LPs and single records, each with contrasting card record center inserts.)
Record decorations. From top: records suspended against a red sheet with coloured centres. Bottom left: Singles covered with different coloured card and center insters; this photo was taken from our test party for the Naughty Nineties but it could easily be adapted to a 70s theme if slightly different cards were used. Bottom right: Singles with record centers from the game's decoration pack; this photo was taken from our test party for the Swinging Sixties but it could easily be adapted for this game if you used the record centers provided with this game's decoration pack.
3 Other Sexy Seventies Decorations Are Groovy, Man
34 Recreate that Seventies feel with period props such as Lava Lamps, plasma globes, bean bag chairs, a record player, a rotary dial phone, or shag pile rugs.
35 Away from the discotheque, Seventies colors were mainly oranges, browns, sunshine yellow, turquoise, and green. Wallpapers and even carpets often had bold or geometric shapes. Tablecloths or other hangings in these colors or with these shapes can take your guests back in time.
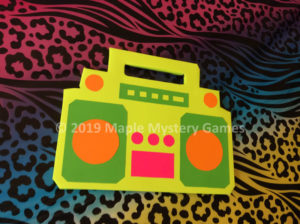
36 Create a cardboard cutout of a Portable Music Player (the Sony Walkman was invented in 1979) and cover it with neon or shiny metallic paper. Hang this from walls or use it as a table centerpiece.
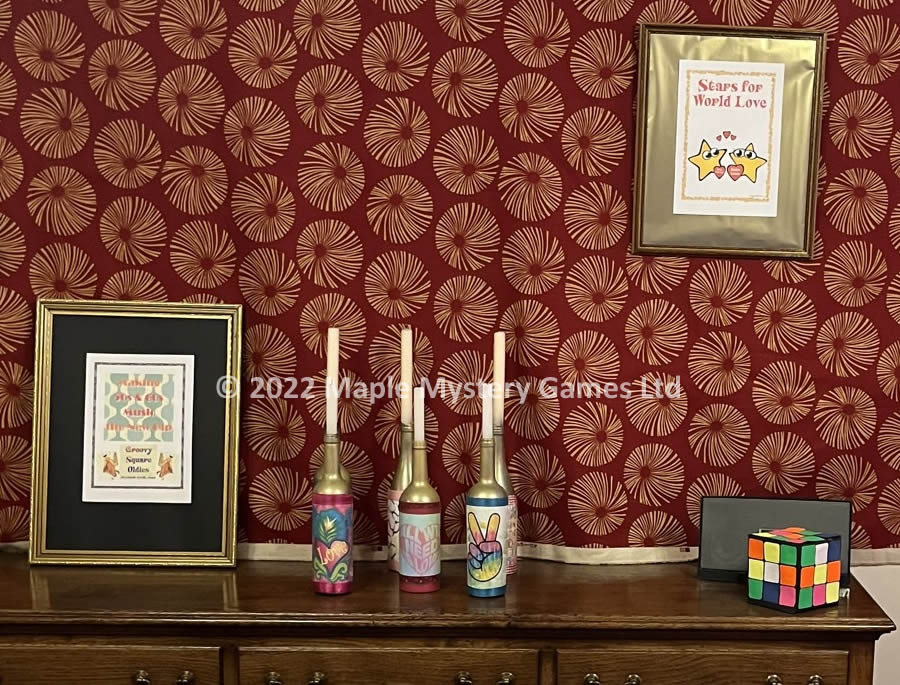
37 The Rubik's Cube was invented in 1974. Scatter cubes onto mantelpieces or shelves. Or create a stellar Rubik's Cube of your own by covering a square box with black card or paper. Then cut out colored squares of paper or card and arrange them on all sides. To mix discotheque and 70s decor, use metallic foil paper for the colored squares. (If using a black paper base, you may need to back metallic foil squares with white paper in order to maintain the bright colors of the foil.)
38 Floppy discs were invented in 1971 - if you can get some old floppy discs from a charity shop then these can be used to add period details.
39 Hang some 70s-inspired clothes on walls - possibilities include bell-bottomed trousers, tie-dyes, crochet dresses, and peasant blouse. Or hang a metallic disco dress or two. Roller skates are also ideal.
40 Buy a bag of 70s party photo booth props and use them as table decorations, wall decorations, place settings, cake toppers - or place them on a table next to your "key photo background" for guests to have fun during the group photo.
41 Cut out large letters from self-colored cards, wrapping paper, or shiny foil paper and use them to form Seventies slang words such as Boogie, Far Out, Funky or Groovy. Arrange these words as a funky table runner - or string the letters together and hang them from the ceiling or down the side of the party entrance. Or create a wall visual by adding them to a large piece of colored card or to a mirror. (Please ensure the mirror is not damaged.)
3.1 Think Hippie
The Hippie movement extended from the 60s into the 70s. Within the game, Storm and Summer are both hippies and have set up a "charity" called Stars for World Love. Within our test party, we had a corner of the dining room to reflect this aspect of the game.
42 Buy or make peace signs and hang from walls.
43 Buy colorful scarves or fabric oddments from charity shops and use them as wall displays or furniture covers.
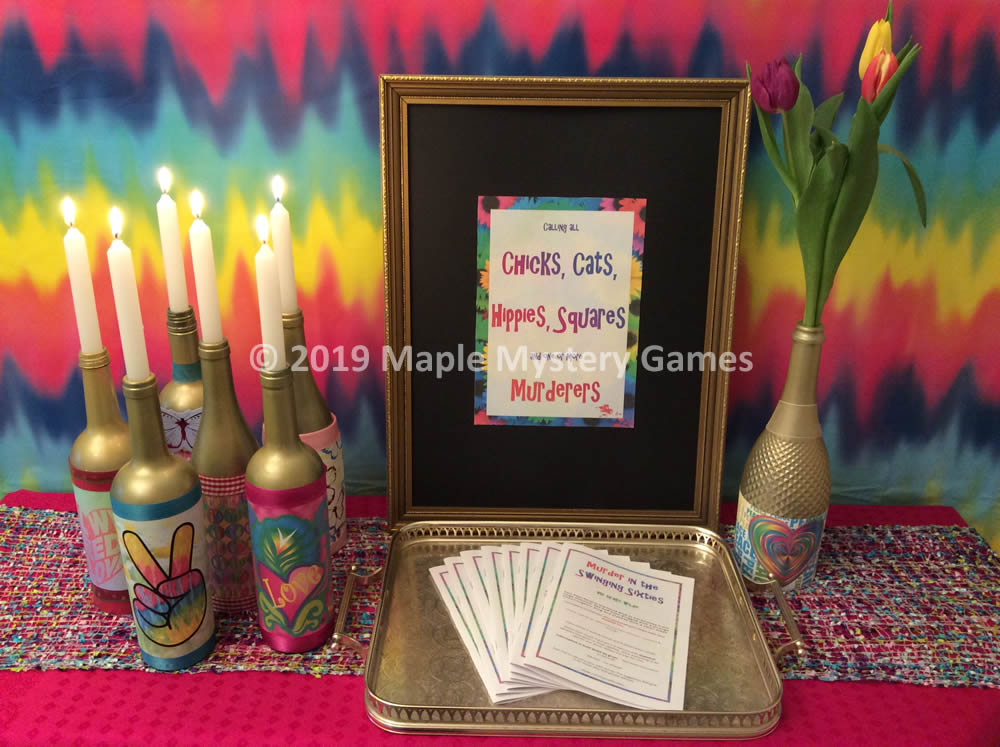
44 Use gold spray paint to spray empty wine bottles. Glue on "peace and love" decorations from free sites such as Pixabay.com and decorate with ribbons or hearts or additional peace signs. Use these bottles as vases or as candle holders. (Obviously, ensure fire safety.)
45 Tie-dye a large flat white sheet to provide a wall hanging. Add peace signs and other hippie memorabilia.
An inexpensive fabric oddment from a charity shop provided a wall covering with both a hippie and a 70s feel; peace and love bottles added to the hippie feel; the "Stars for World Love" poster is from the game's decoration pack.
3.2 Think Psychedelic
46 The Psychedelic Movement lasted until the mid-1970s so any form of psychedelic art or decorations is appropriate. Think bright saturated colors, and kaleidoscopic designs that are distorted.
47 Add LED or fairy lights.
48 Add brightly colored ornaments.
49 Add anything "trippy" such as mushrooms.
50 Hang a wildly clashing mix of brightly colored scarves, tapestries, duvet covers or sheets from walls. Optionally, place over seating. Even use to cover your ceiling in a vibrant, cluttered swathe of color.
51 Consider a psychedelic scene setter. Amscan offer a vibrant room roll. Although called a 60s Groovy Room Roll, it is also an ideal psychedelic scene setter. (We bought this from Amazon.) Compare the peace and love bottles in our Swinging Sixties party (below) with the same bottles set against a hippie background (above). Note how the brightly colored scarves add a visual richness that is appropriate to both the hippie and psychedelic movements.
These hippie peace and love bottles are brought to life by the groovy psychedelic scene setter from Amscan and also the mix of scarves covering the sideboard. This image is taken from our Swinging Sixties test party but the ideas would also be appropriate for this game.
52 Use a hippie or psychedelic font to sketch out phrases such as "Think Hippie Be Happy" or "Trippy Hippie" in bright saturated colors. Optionally add hippie signs such as peace signs or flowers. Add these to walls.